Software Installation
The SHFQC+ Instrument is operated from a host computer with the LabOne software. To install the LabOne software on a computer, administrator rights may be required. In order to simply run the software later, a regular user account is sufficient. Instructions for downloading the correct version of the software packages from the Zurich Instruments website are described below in the platform-dependent sections. It is recommended to regularly update to the latest software version provided by Zurich Instruments. Thanks to the Automatic Update check feature, the update can be initiated with a single click from within the user interface, as shown in Software Update.
Installing LabOne on Windows
The installation packages for the Zurich Instruments LabOne software are available as Windows installer .msi packages. The software is available on the Zurich Instruments Download Center. Please ensure that you have administrator rights for the PC on which the software is to be installed. See LabOne compatibility for a comprehensive list of supported Windows systems.
Windows LabOne Installation
- The SHFQC+ Instrument should not be connected to your computer during the LabOne software installation process.
-
Start the LabOne installer program with a name of the form
LabOne64-XX.XX.XXXXX.msiby a double click and follow the instructions. Windows Administrator rights are required for installation. The installation proceeds as follows:-
On the welcome screen click the Next button.

Figure 1: Installation welcome screen -
After reading through the Zurich Instruments license agreement, check the "I accept the terms in the License Agreement" check box and click the Next button.
-
Review the features you want to have installed. For the SHFQC+ Instrument the "SHFQC+ Series Device", "LabOne User Interface" and "LabOne APIs" features are required. Please install the features for other device classes as well, if required. To proceed click the Next button.
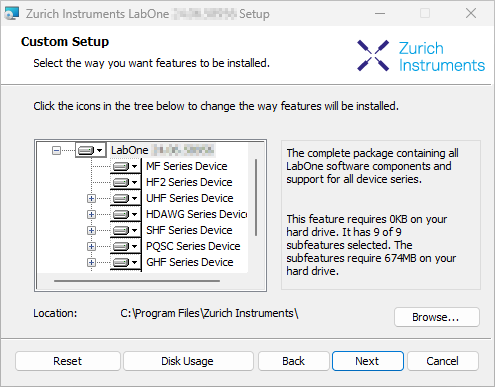
Figure 2: Custom setup screen -
Select whether the software should periodically check for updates. Note, the software will still not update automatically. This setting can later be changed in the user interface. If you would like to install shortcuts on your desktop area, select "Create a shortcut for this program on the desktop". To proceed click the Next button.
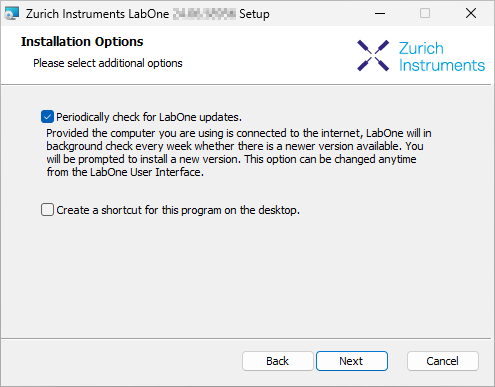
Figure 3: Automatic update check -
Click the Install button to start the installation process.
-
Windows may ask up to two times to reboot the computer if you are upgrading. Make sure you have no unsaved work on your computer.
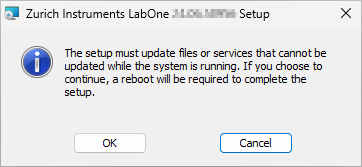
Figure 4: Installation reboot request -
During the first installation of LabOne, it is required to confirm the installation of some drivers from the trusted publisher Zurich Instruments. Click on Install.

Figure 5: Installation driver acceptance -
Click OK on the following notification dialog.

Figure 6: Installation completion screen
-
-
Click Finish to close the Zurich Instruments LabOne installer.
- You can now start the LabOne User Interface as described in LabOne Software Start-up and choose an instrument to connect to via the Device Connection dialog shown in Device Connection dialog.
Warning
Do not install drivers from another source other than Zurich Instruments.
Running LabOne manually from the Command Line
After installing the LabOne software, the Web Server and Data Server can be started manually using the command-line. The more common way to start LabOne under Windows is described in LabOne Software Start-up. The advantage of using the command line is being able to observe and change the behavior of the Web and Data Servers.
Running the Web Server from the Command Line
Before running the Web Server from the terminal, the user needs to ensure there is no other instance of the Web Server running in the background, since only one instance of the Web Server can run on a computer at a time. This can be checked using the Tray Icon as shown below.
To start the Web Servers manually, open a command-line terminal (Command Prompt, PowerShell
(Windows) or Bash (Linux)). The current working directory
needs to be the installation directory of the Web Server, usually
C:\Program Files\Zurich Instruments\LabOne\WebServer.
The behavior of the Web Server can be changed by
providing command line arguments. For a detailed list of all arguments
see the command line help text:
$ ziWebServer --help
One useful application of running the Webserver manually from a terminal window is to change the data directory from its default path in the user home directory. The data directory is a folder in which the LabOne Webserver saves all the measured data in the format specified by the user.
The corresponding command line argument to specify the data path is
--data-path and the command to start the LabOne Webserver with a
non-default directory path, e.g., C:\data is
C:\Program Files\Zurich Instruments\LabOne\WebServer> ziWebServer --data-path "C:\data"
Running the Data Server from the Command Line
By default, the Data Server runs on Windows as a background service. To avoid conflicts with TCP port assignment, before running the Data Server from the terminal the user needs to ensure that the Data Server running in the background is stopped.
There are two ways to enable/disable the data servers, one from the LabOne user interface and one from the Windows services application.
In the "Advanced" mode of LabOne Session Manager, press the "Configure" button to open the following window for switching on/off the data servers.

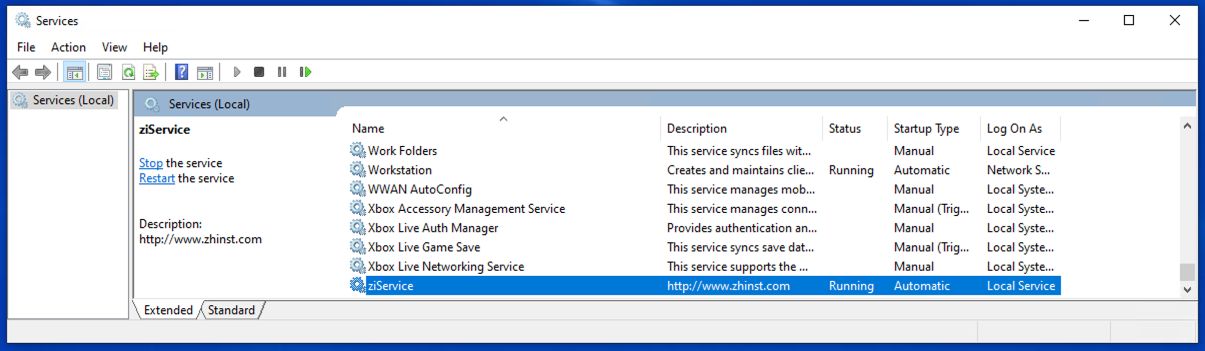
Alternatively, open the Windows "Services" app as shown below, look for the ziService, right click on it and click "Stop".
Now that the Data Server is not running anymore in the background, it can be started manually. Open a command-line terminal (Command Prompt, PowerShell (Windows) or Bash (Linux)) and run:
PS C:\Users\user> & 'C:\Program Files\Zurich Instruments\LabOne\DataServer\ziDataServer.exe'
To show logs with higher verbosity, the --debug 1 flag can be used:
PS C:\Users\user> & 'C:\Program Files\Zurich Instruments\LabOne\DataServer\ziDataServer.exe' --debug 1
Windows LabOne Uninstallation
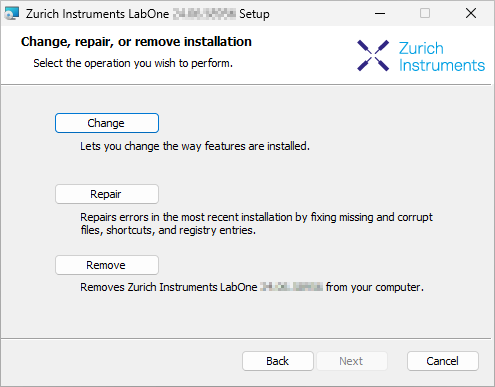
To uninstall the LabOne software package from a Windows computer, one can open the "Installed apps" page from the Windows start menu and search for LabOne. By selecting the LabOne item in the list of apps, the user has the option to "Uninstall" or "Modify" the software package as shown in Figure 8.

Warning
Although it is possible to install a new version of LabOne on a currently-installed version, it is highly recommended to first uninstall the older version of LabOne from the computer and then, install the new version. Otherwise, if the installation process fails, the current installation is damaged and cannot be uninstalled directly. The user will need to first repair the installation and then, uninstall it.
In case a current installation of LabOne is corrupted, one can simply repair it by selecting the option "Modify" in Figure 8. This will open the LabOne installation wizard with the option "Repair" as shown in Figure 9.
After finishing the repair process, the normal uninstallation process described above can be triggered to uninstall LabOne.
Installing LabOne on macOS
LabOne supports both Intel and ARM (M-series) architectures within a single universal disk image (DMG) file available in our Download Center.
-
Download and double-click the DMG file to mount the image.

-
The image contains a single LabOne application with all services needed.
-
Once the application is started, a labone icon will appear in the menu bar. It allows the user to easily open a new session and shows the status of all services.

Note
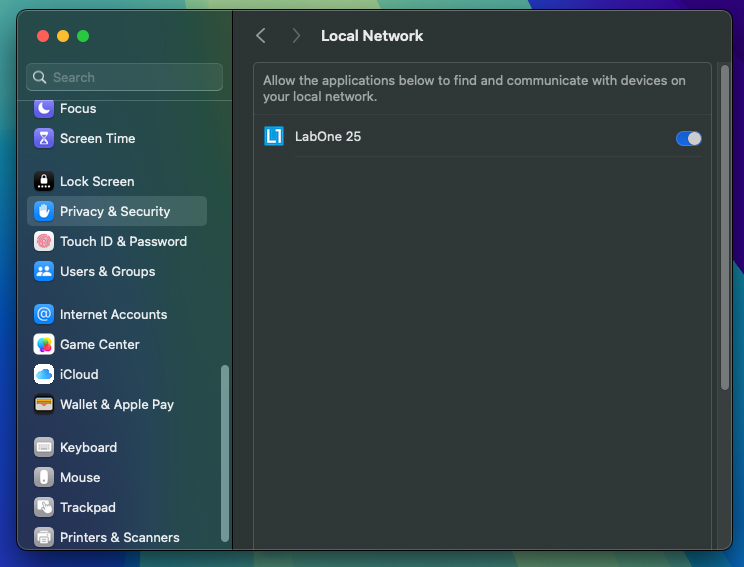
LabOne needs Local Network Access permissions. When LabOne is first started, a pop-up will appear asking to grant such permissions.
If you miss the pop-up, the permissions can also be enabled manually in Settings > Privacy & Security > Local Network.
Uninstalling LabOne on macOS
To uninstall LabOne on macOS, simply drag the LabOne application to the trash bin.
Application Content
The LabOne application contains all resources available for macOS. This includes:
- The binaries for the Web Server and Data Servers.
- The binaries for the C, MATLAB, and LabVIEW APIs.
- An offline version of the user manuals.
- The latest firmware images for all instruments.
To access this content, right-click on the LabOne application and select "Show Package Contents". Then, go into Contents/Resources.
Note
Since the application name contains a space, one needs to escape it when
using the command line to access the contents:
cd /Applications/LabOne\ XX.XX.app/Contents/Resources
Start LabOne Manually on the Command Line
To start the LabOne services like the data server and web server manually, one can use the command line.
The data server binary is called ziDataServer (ziServer for HF2
instruments) and is located at
Applications/LabOne\ XX.XX.app/Contents/Resources/DataServer/.
The web server binary is called ziWebServer and is located at
Applications/LabOne\ XX.XX.app/Contents/Resources/DataServer/.
Note
No special command line arguments are needed to start the LabOne
services. Use the --help argument to see all available options.
Installing LabOne on Linux
Requirements
Ensure that the following requirements are fulfilled before trying to install the LabOne software package:
-
LabOne software supports typical modern GNU/Linux distributions (Ubuntu 14.04+, CentOS 7+, Debian 8+). The minimum requirements are glibc 2.17+ and kernel 3.10+.
-
You have administrator rights for the system.
-
The correct version of the LabOne installation package for your operating system and platform have been downloaded from the Zurich Instruments Download Center:
LabOneLinux<arch>-<release>.<revision>.tar.gz,
Please ensure you download the correct architecture (x86-64 or arm64) of
the LabOne installer. The uname command can be used in order to
determine which architecture you are using, by running:
uname -m
in a command line terminal. If the command outputs x86_64 the x86-64
version of the LabOne package is required, if it displays aarch64 the
ARM64 version is required.
Linux LabOne Installation
Proceed with the installation in a command line shell as follows:
-
Extract the LabOne tarball in a temporary directory:
tar xzvf LabOneLinux<arch>-<release>-<revision>.tar.gz -
Navigate into the extracted directory.
cd LabOneLinux<arch>-<release>-<revision> -
Run the install script with administrator rights and proceed through the guided installation, using the default installation path if possible:
sudo bash install.shThe install script lets you choose between the following three modes:
- Type "a" to install the Data Server program, the Web Server program, documentation and APIs.
- Type "u" to install
udevsupport (only necessary if HF2 Instruments will be used with this LabOne installation and not relevant for other instrument classes). - Type "ENTER" to install both options "a" and "u".
-
Test your installation by running the software as described in the next section.
Running the Software on Linux
The following steps describe how to start the LabOne software in order to access and use your instrument in the User Interface.
-
Start the Web Server program at a command prompt:
$ ziWebServer -
Start an up-to-date web browser and enter the
127.0.0.1:8006in the browser’s address bar to access the Web Server program and start the LabOne User Interface. The LabOne Web Server installed on the PC listens by default on port number 8006 instead of 80 to minimize the probability of conflicts. -
You can now start the LabOne User Interface as described in LabOne Software Start-up and choose an instrument to connect to via the Device Connection dialog shown in Device Connection dialog.
Important
Do not use two Data Server instances running in parallel; only one instance may run at a time.
Uninstalling LabOne on Linux
The LabOne software package copies an uninstall script to the base
installation path (the default installation directory is /opt/zi/). To
uninstall the LabOne package please perform the following steps in a
command line shell:
-
Navigate to the path where LabOne is installed, for example, if LabOne is installed in the default installation path:
$ cd /opt/zi/ -
Run the uninstall script with administrator rights and proceed through the guided steps:
$ sudo bash uninstall_LabOne<arch>-<release>-<revision>.sh