Connecting to the MFLI Instrument
The Zurich Instruments MFLI is designed to work out of the box with minimal effort on the part of the user. The Zurich Instruments LabOne software runs on an embedded PC in the MFLI instrument and is pre-installed before delivery. One of the programs running on the embedded PC is the LabOne Web Server, which can be connected to via a web browser once suitable physical and logical connections to the instrument have been established.
Note
The following web browsers are supported (latest versions)

There are two ways to physically connect to the instrument:
- Ethernet (no software installation required). Integrate the instrument into an existing local area network (LAN) by connecting the instrument to a switch in the LAN using an Ethernet cable. The instrument can then be accessed from a web browser running on any device in the same LAN. The Ethernet connection can also be point-to-point. This requires some adjustment of the network card settings of the host computer. Depending on the network configuration and the installed network card, one or the other connection scheme is better suited.
- Universal Serial Bus (USB). The USB connection is a point-to-point connection between the instrument and the host computer to which the USB cable is connected. This requires the installation of an RNDIS driver on the host computer. For more information, look at Universal Serial Bus (USB) Connection.

Figure 1 shows some examples of possible configurations of computer to instrument connectivity.
Ethernet TCP/IP Connection
The simplest connection method is to integrate the instrument into an existing LAN supporting the Domain Name System (DNS) and dynamic DNS update. In such a network the MFLI instrument can be addressed using its serial number instead of its IP address. Attach an Ethernet cable from the instrument to a LAN network switch. The LabOne User Interface can be started by typing the following text in the address bar of a web browser running on a computer in the LAN:
http://<instrument-serial>.<domain>/, or
http://<instrument-serial>.local/, or
http://<instrument-serial>/
where <instrument-serial> is the serial number of the instrument and
<domain> is the network domain in which the instrument is running.
This approach uses DNS lookup to resolve the IP address of the instrument which is configured with this network name by default. It is possible that this approach fails due to special network policies or for other reasons. In that case, there are other options to configure the TCP/IP connection to the instrument. These are described in Advanced TCP/IP Configuration.
With connection via LAN, multiple web browser and API client sessions have simultaneous access and control over the instrument. Therefore changes made to the settings of the instrument by say a Python program via the API will be seen by a web browser session connected to that instrument. The instrument data can be streamed to multiple client sessions simultaneously.

Universal Serial Bus (USB) Connection
To control the instrument via USB, connect the instrument with the supplied USB cable to the PC you are using. Depending on the operating system you are using, it may be necessary to install a USB RNDIS device driver on the PC. The RNDIS provides a virtual Ethernet link to the instrument enabling it to be addressed using the normal IP address and host name mechanisms. The RNDIS driver installation procedure for various operating systems is described in the following.
Warning
Downgrading the firmware of instruments with 5-digit serial numbers to a version older than LabOne 23.10 can result in non-functioning USB connection. It is strongly recommended to use the latest version of LabOne and always upgrade the instrument firmware. In case, an old version of firmware is needed, the Ethernet port might be the only way to communicate with the instrument. Please contact Zurich Instruments at support@zhinst.com if you need to downgrade the instrument firmware.
USB RNDIS Device Driver Windows
Zurich Instruments provides a Microsoft MSI installer to simplify the
Windows RNDIS driver installation. The MFLI Instrument is designed so
that when the USB cable is plugged in, a flash disk partition appears
with the label MF-DRIVER, containing the required Windows MSI
installer for the USB RNDIS device driver, plus the instrument user
manual in PDF form and a copy of this Getting Started chapter.
Proceed with the device driver installation as follows:
-
Log on to the PC as an administrator. Installing the USB RNDIS device driver requires administrator rights.
-
Ensure that the USB cable is connected from the PC to the MFLI Instrument.
-
Power cycle the MFLI Instrument and wait for approximately 20 seconds for the instrument initialization to complete. During this time an AutoPlay window will pop up showing the newly detected MFLI drive.
-
In the AutoPlay window, select Open folder to view files.
-
Two installers will be visible in Windows Explorer: Double click on the .msi installer appropriate for your operating system. This will be either
MF-Device-Finder64.msifor 64 bit operating systems, orMF-Device-Finder32.msifor 32 bit operating systems.
Figure 3: Read-only drive of the MFLI shown in the File Explorer -
In the welcome screen click the Next button.
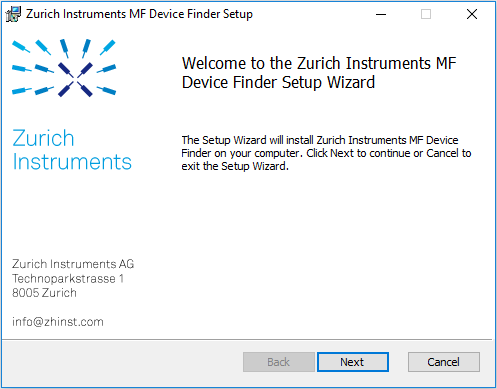
Figure 4: Installation welcome screen -
After reading through the Zurich Instruments license agreement, check the "I accept the terms in the License Agreement" check box and click the Next button.
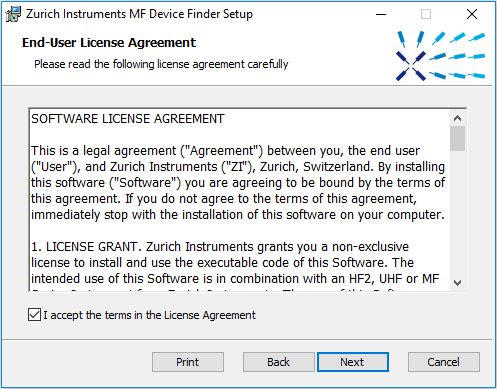
Figure 5: Installation license agreement -
In the Custom Setup screen click the Next button.
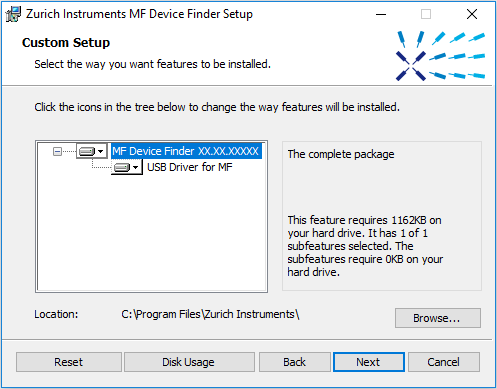
Figure 6: Custom setup screen -
Click the Install button to start the installation.

Figure 7: Installation confirmation 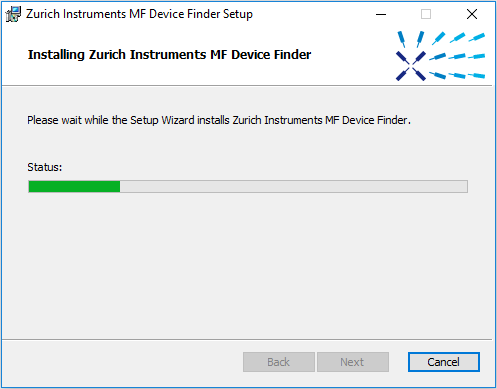
Figure 8: Installation progress If the User Account Control pop-up window appears, click Yes to allow the installation program to make changes to the computer.
-
On Windows Server 2008 and Windows 7 it is required to confirm the installation of up to 2 drivers from the trusted publisher Zurich Instruments. Click on Install. You can also click the Always trust software from "Zurich Instruments AG" check box to prevent the message from appearing in the future.
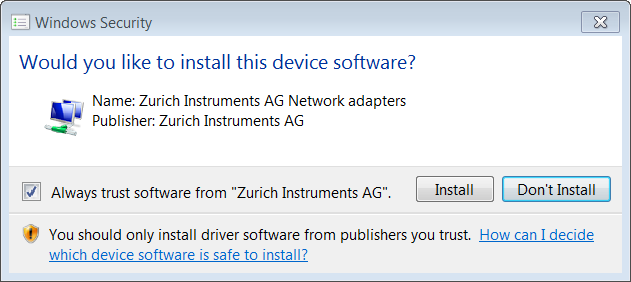
Figure 9: Installation driver acceptance -
Click the Finish button to complete the installation.

Figure 10: Installation complete
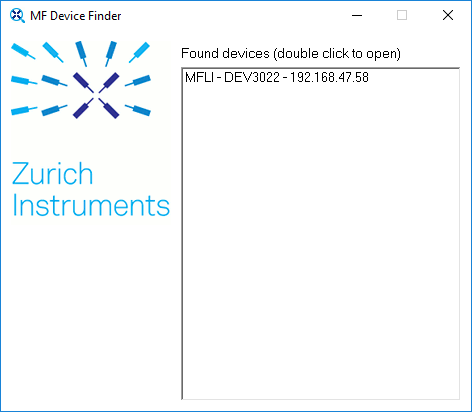
The installation of the driver will create a Windows Start Menu
entry1 in Start Menu → Zurich Instruments → MF Device Finder. This
link will open the ZI MF Device Finder shown in MF Device
Finder. In the list of devices,
identify your instrument by its serial number found on the back panel.
Double-click on the entry for your instrument to open the default
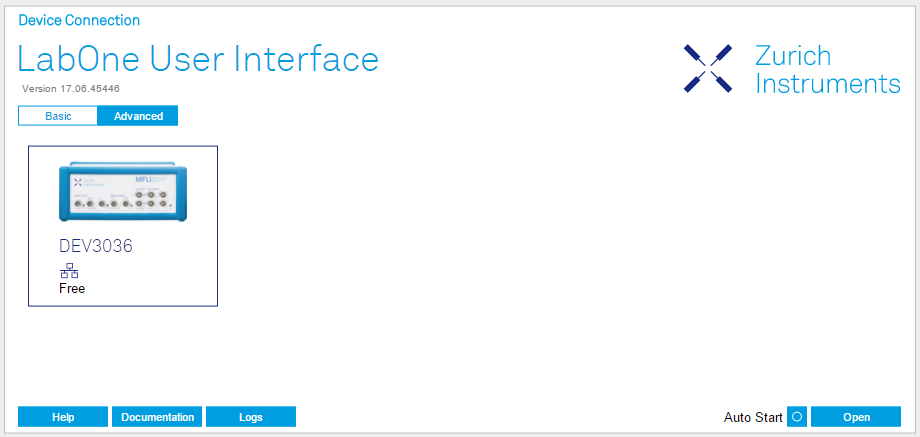
browser with the LabOne Device Connection dialog shown in Figure 13 Click on Open
on the bottom right of the screen to open a LabOne browser session with
the default settings.

Note
The procedure described in this section works both for 1GbE and USB connections. In case you use 1GbE, you can also connect to the Instrument without software installation using just a web browser. To that end, follow the instructions in Ethernet TCP/IP Connection.
USB RNDIS Device Driver Linux
With an up-to-date version of an Ubuntu Linux distribution there is no special installation necessary and the USB connection works out of the box. Other Linux distributions should also work but may require further installation steps. Detailed instructions cannot be given here due to the large number of Linux distributions available.
USB RNDIS Device Driver macOS
There is no current RNDIS driver available for macOS and as a result, the USB port of the MFLI cannot be used to communicate with macOS systems. Instead, one can use a USB-C to gigabit Ethernet adapter and an Ethernet cable to communicate with the MFLI via its 1GbE port on the rear panel of the instrument.
Advanced TCP/IP Configuration
Various schemes are possible for logically connecting to the MFLI instrument via TCP/IP.
- DHCP (the simplest scheme for the user and the default)
- Static IP (the fallback if DHCP fails)
- Point-to-point (P2P)
DHCP is the simplest and preferred connection method. Other connection methods can become necessary when using network configurations that are in contradiction with the local policies.
DHCP
The most straightforward Ethernet connection method is to rely on a LAN configuration to recognize the MFLI Instrument. This is the MFLI Instrument’s default configuration. By connecting the instrument in a LAN, a dynamic IP address is assigned to it like to any other PC by the DHCP server. In case of restricted networks, the network administrator may be required to register the instrument on the network by means of the MAC address. The MAC address is indicated on the back panel of the instrument. If the network configuration does not allow or does not support DHCP it is necessary to use a static IP setup as described below.
Static Instrument IP
Although it is highly recommended to use dynamic IP assignment method in the host network of the instrument, there may be cases where the user wants to assign a static IP to the instrument. For instance, when the host network only contains Ethernet switches and hubs but no Ethernet routers are included, there is no DHCP server to dynamically assign an IP to the instrument. It is still advised to add an Ethernet router to the network and benefit from dynamic IP assignment; however, if a router is not available, the instrument can be configured to work with a static IP.
Note that the static IP assigned to the instrument must be within the
same range of the IP assigned to the host computer. Whether the host
computer’s IP is assigned statically or by a fallback mechanism, one can
find this IP by running the command ipconfig or ipconfig/all in the
operating system’s terminal. As an example, IP and subnet mask of host
computer shows the outcome of
running ipconfig in the terminal.
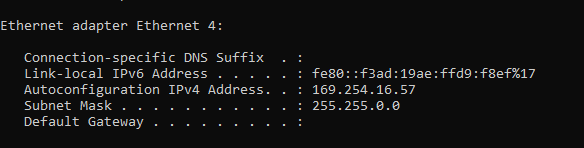
It shows the network adapter of the host computer can be reached via the
IP 169.254.16.57 and it uses a subnet mask of 255.255.0.0. To make
sure that the instrument is visible to this computer, one needs to
assign a static IP of the form 169.254.x.x and the same subnet mask to
the instrument. To do so, the user should follow the instructions below.
-
Attach the instrument using an Ethernet cable to the network where the user’s computer is hosted.
-
Attach the instrument via a USB cable to the host computer and switch it on.
-
Open the LabOne user interface (UI) and connect to the instrument via USB.
-
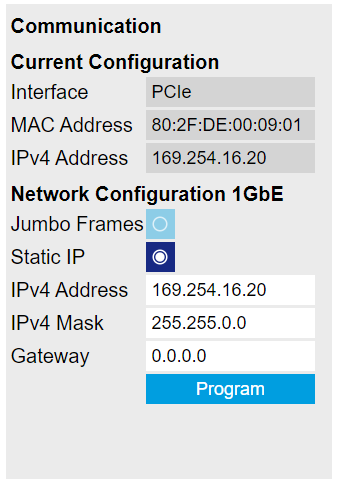
Open the "Device" tab of the LabOne UI and locate the "Communication" section as shown in Figure 15.
-
Write down the desired static IP, e.g.
169.254.16.20, into the numeric field "IPv4 Address". -
Add the same subnet mask as the host computer, e.g.
255.255.0.0to the numeric field "IPv4 Mask". -
You can leave the field "Gateway" as
0.0.0.0or change to be similar to the IP address but ending with1, e.g.169.254.16.1. -
Enable the radio button for "Static IP".
-
Press the button "Program" to save the new settings to the instruments.
-
Power cycle the instrument and remove the USB cable. The instrument should be visible to LabOne via Ethernet connection.
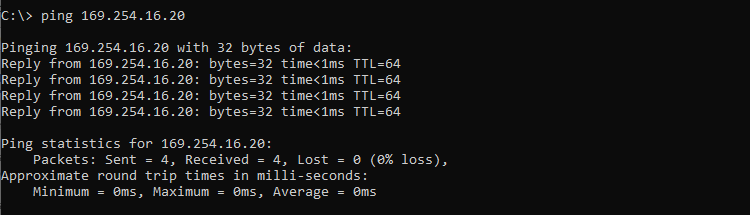
To make sure the IP assignment is done properly, one can use the command
ping to check if the instrument can be reached through the network
using its IP address. Figure 16 shows the outcome of
ping when the instrument is visible via the IP 169.254.16.20.
If set properly according to the instructions above, the instrument will use the same static IP configurations after each power cycle.
Requirements
- The chosen static IP address must be unique within the LAN.
- Needs network administrator support on networks with dynamic IP configuration (the static IP address will need to be reserved).
Fallback Device IP
When configured to a dynamic address, but no DHCP server is present in the network, e.g., device connected directly to a PC, the instrument falls back on an IP address in the local link IP range that is 169.254.x.x. If the host computer has also an IP address within the same range, the instrument becomes visible to the LabOne data server running on the host computer. This way, there is no need to go through the process described above to assign a static IP to the instrument.
Point-to-Point (P2P)
Setting up a point-to-point network consisting only of the host computer and the MFLI avoids problems related to special network policies. Since it is nonetheless necessary to stay connected to the internet, it is recommended to install two network cards in your computer, one of them for network connectivity, the second one for connecting to the MFLI Instrument. Notebooks can generally profit from wireless LAN for internet connection.
-
Use one of the network cards and set it to static IP in TCP/IPv4 using the IP address
192.168.1.n, where n=[2..9] and the mask255.255.255.0, see Figure 17 (go toControl Panel → Internet Options → Network and Internet→ Network and Sharing Center → Local Area Connection → Properties).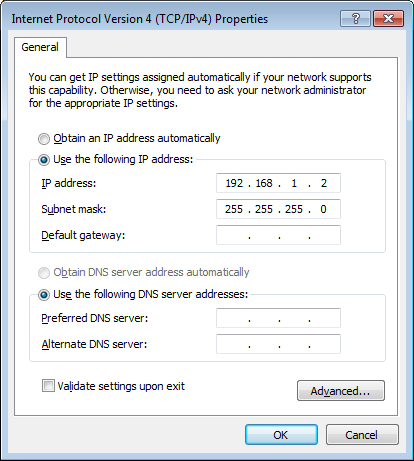
Figure 17: Static IP configuration of PC -
Set the MFLI IP address to the static value
192.168.1.10as described in the previous section. To connect to the MFLI Instrument and start the LabOne User Interface, type the following in the address bar of a web browser:http://192.168.1.10/
Requirements
- Two networks cards needed for additional connection to internet
- Network adapter connected to the instrument must be in static IP4 configuration
Note
A power cycle of the MFLI Instrument is required if it was previously connected to a network that provided an IP address to the instrument and then the user decides to run in static IP configuration.
Note
Only IP v4 is currently supported. There is no support for IP v6.
Note
If the instrument is detected by LabOne but the connection can not be established, the reason can be the firewall blocking the connection. It is then recommended to change the P2P connection from Public to Private.
Warning
Changing the IP settings of your network adapters manually can interfere with its later use, as it can no longer be used for network connectivity until it is set again for dynamic IP.
-
Under Windows 7 and 8, the Start Menu entry is found in
Start Menu → All programs / All apps → Zurich Instruments → MF Device Finder↩