User Interface Overview
UI Nomenclature
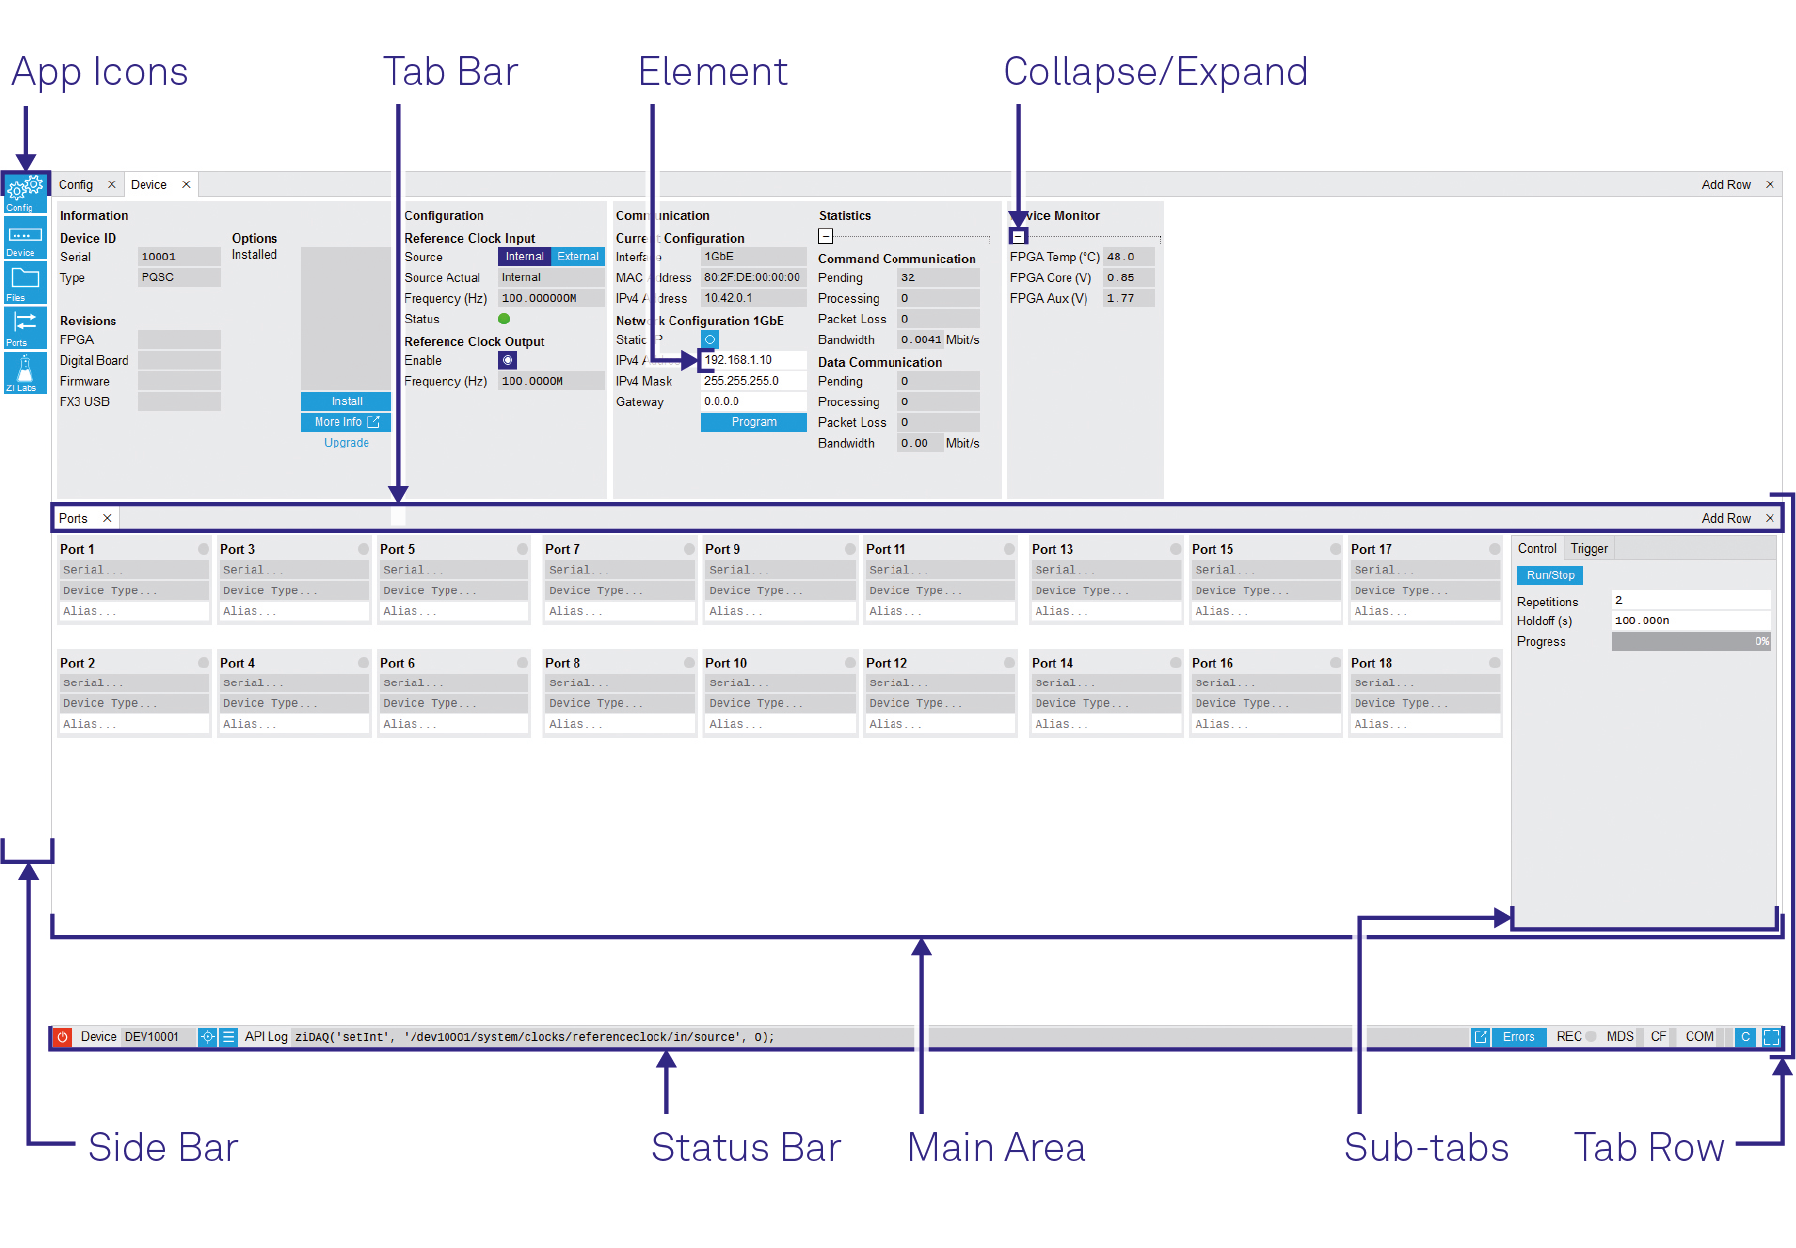
This section provides an overview of the LabOne User Interface, its main elements and naming conventions. The LabOne User Interface is a browser-based UI provided as the primary interface to the QHub instrument. Multiple browser sessions can access the instrument simultaneously and the user can have displays on multiple computer screens. Parallel to the UI, the instrument can be controlled and read out by custom programs written in any of the supported languages (e.g. LabVIEW, MATLAB, Python, C) connecting through the LabOne APIs.

The LabOne User Interface automatically opens some tabs by default after a new UI session has been started. At start-up, the UI is divided into two tab rows, each containing a tab structure that gives access to the different LabOne tools. Depending on display size and application, tab rows can be freely added and deleted with the control elements on the right-hand side of each tab bar. Similarly, the individual tabs can be deleted or added by selecting app icons from the side bar on the left. A click on an icon adds the corresponding tab to the display, alternatively the icon can be dragged and dropped into one of the tab rows. Moreover, tabs can be moved by drag-and-drop within a row or across rows.
Table 1 gives a brief descriptions and naming conventions for the most important UI items.
| Item name | Position | Description | Contains |
|---|---|---|---|
| side bar | left-hand side of the UI | contains app icons for each of the available tabs - a click on an icon adds or activates the corresponding tab in the active tab row | app icons |
| status bar | bottom of the UI | contains important status and warning indicators, device and session information, and access to the command log | status indicators |
| main area | center of the UI | accommodates all active tabs – new rows can be added and removed by using the control elements in the top right corner of each tab row | tab rows, each consisting of tab bar and the active tab area |
| tab area | inside of each tab | provides the active part of each tab consisting of settings, controls and measurement tools | sections, plots, sub-tabs, unit selections |
Unique Set of Analysis Tools
All instruments feature a comprehensive tool set for connecting and synchronizing multiple instruments.
The following table gives the overview of all app icons. Note that the selection of app icons may depend on the upgrade options installed on a given instrument.
Table 3 provides a quick overview over the different status bar elements along with a short description.


